
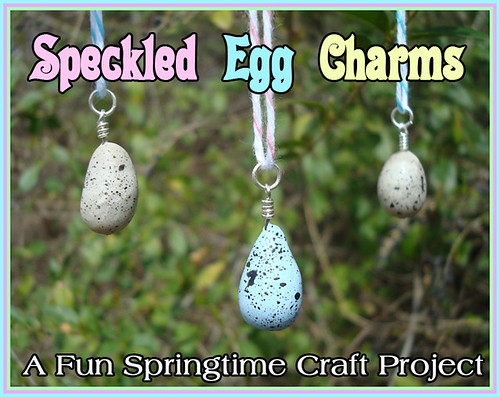
Hello and happy spring! I am fully embracing the lovely weather and all the inspiration that comes fluttering to my craft desk as springtime draws near. I've even caught myself naming spring as my favorite season, although I'm fully aware that I said the same thing about fall just a few short months ago. To celebrate this lovely season, I've put together a fun tutorial for anyone who's feeling as crafty and inspired as I have. This would be a great project for Easter weekend or a sunny afternoon when the birds are chirping outside.
Supplies:
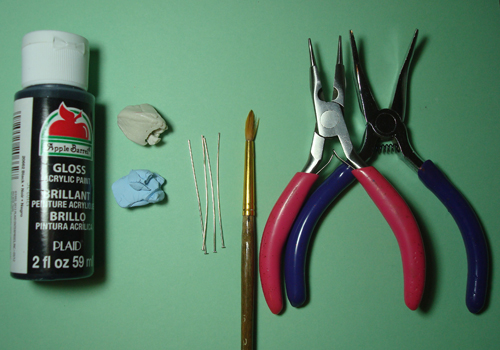
- Black acrylic paint
- Polymer clay in white or light blue
- Headpins
- Paintbrush
- Jewelry pliers
- Headpins
- Paintbrush
- Jewelry pliers
Instructions:
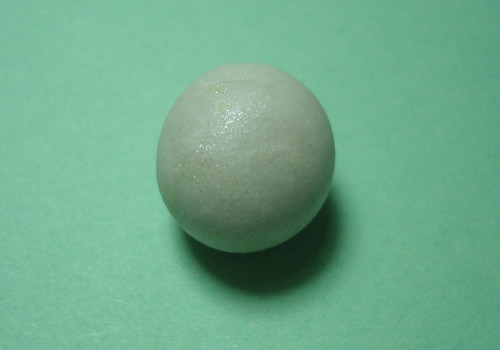
1) As with any polymer clay project, the first step is to condition the clay by rolling it in your hands, forming a sphere between your palms.
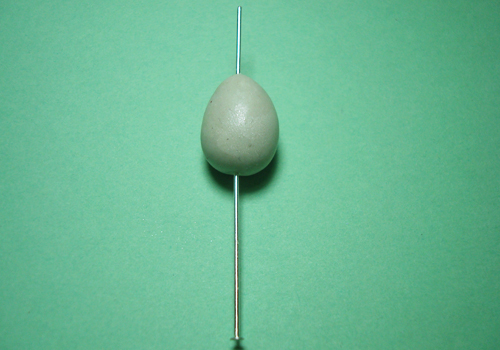
2) To create an egg shape, roll the ball of clay on one side only with your hands slanted against a flat surface.
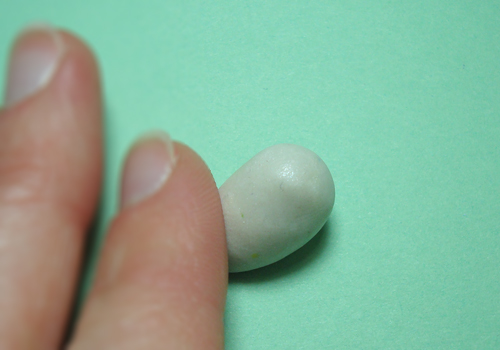
3) Once you've sculpted your clay into a nice egg shape, pierce it vertically with a headpin. Smooth away any fingerprints by gently running your finger along the surface of the egg.
4) Place the clay in an oven-safe pan and bake according to the directions on the package of clay.
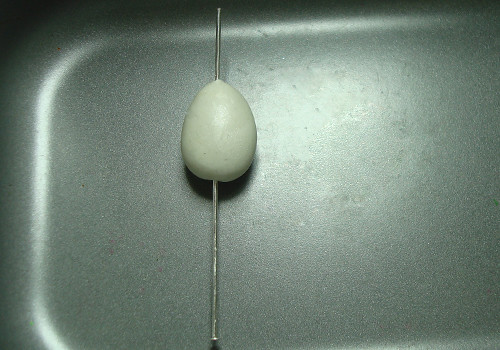
5) Allow the cured eggs to cool completely (about 5-10 minutes after removing them from the oven). The next part of the project gets pretty messy, so you'll want to cover your work surface with something disposable such as old newspaper. I used a sheet of parchment paper. Pour a small puddle of black paint and dip your brush in water.
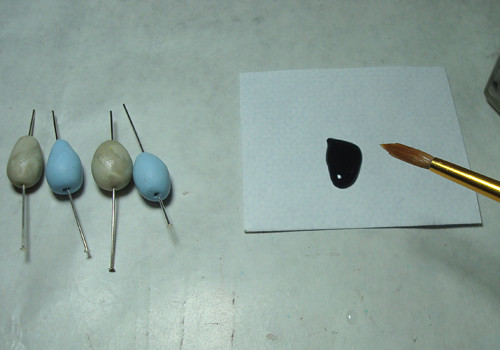
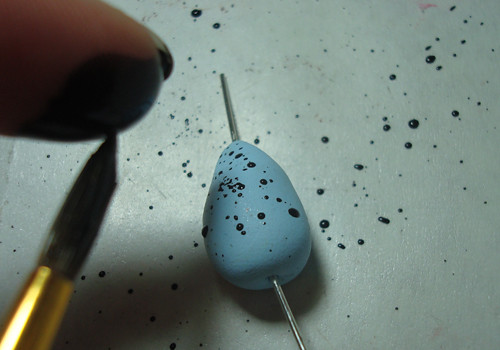
6) Once your brush has been thoroughly soaked with water, dip it in the black paint and begin flicking the paint toward the egg. Acrylic paint washes off completely with soap and warm water if you wash your hands while it's still wet, so I just used my index finger to flick the paintbrush.
7) Lay the eggs on the disposable paper and allow the paint to dry.
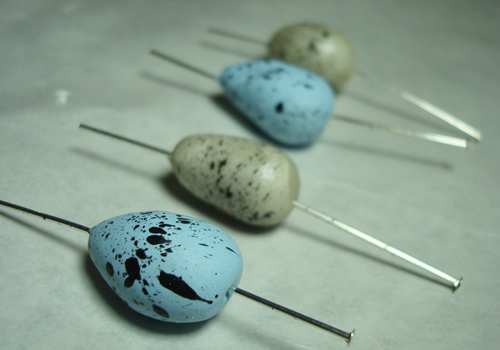
8) Once the paint has dried, it's time to get out your pliers and wire wrap the headpin. If you need help with this step, you're in luck! I recently posted a wire-wrapping tutorial on my blog, which you can find here. If wire-wrapping seems a little intimidating, you can always just bend the top of the headpin to create a loop.
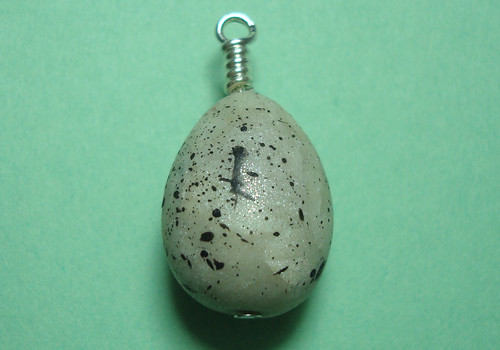
9) Continue the last step on any additional egg charms until they've all got a nice loop to dangle from. You can add a coat of sealer or varnish if you're worried about your paint speckles chipping away.
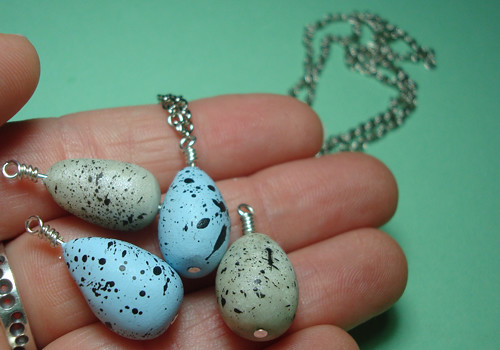
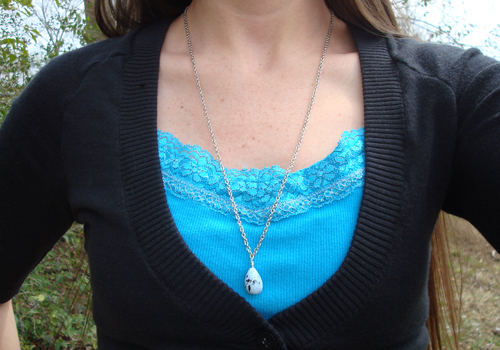
10) You may wish to attach your new charm to a chain to create a lovely nature-inspired necklace.
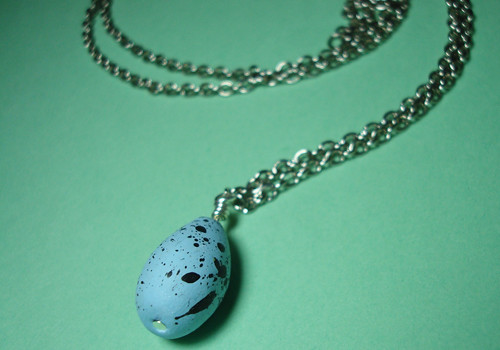
I had so much fun with this project, I decided to wear a colorful outfit to show off my new spring bling.
Additional Ideas:
- Instead of making these into charms, sculpt them without a hole and place them in a little nest or bowl to add a natural touch to your home. You could create an egg for each family member!
- These would be a great addition to your child's Easter basket. Long after the chocolate has been eaten, these keepsakes will still be around to provide springtime memories.
- Thread these charms onto colorful string and use them as ornaments in your trees or plants.
- If you are doing this project with children, use it as a learning opportunity! See if your local library has any nonfiction books about eggs. A few suggestions are Guess What Is Growing Inside This Egg by Mia Posada and Eggs by Marilyn Singer.
- Go on a nature walk and see if you can spot any bird's nests.
I hope your spring is full of warm days, long walks, and all the beauty nature has to offer!
3 comments:
Your tutorials are so inpiring! Thank you for sharing Holly!
And yeah, spring and the warmer if crazy weather is always a time to renew energies!
these are adorable!!!
i've been busy making a few pysanky - Ukrainian Easter eggs :) happy spring to you, too!
These are SO fabulous, Holly! I am wondering - could you do something similar with paper clay? Such a great spring-Easter project!
Post a Comment