Showing posts with label tutorials. Show all posts

Saturday, September 5, 2015

My Attempt at Plarn

That's right, you read it correctly.  I said plarn.  If you've never heard this word before, "plarn" means plastic yarn, made from strips of plastic bags.  Do a quick web search to discover a plethora of amazing things you can make from this fun (and free!) craft material.  Pinterest alone has enough projects to keep your creative gears going for years.  I recently decided to try my hand at making a plarn basket to keep on my kitchen table, and I found this project to be incredibly fun and addictive.  You'll never look at plastic bags the same once you've used them as a readily accessible craft supply.

Plarn (Plastic Yarn) Basket

This tutorial requires a basic understanding of crochet techniques, and I wouldn't recommend it as your very first crochet project because the knots in the yarn and the bulky stitches could be a little tricky for a brand-new crocheter.  But once you practice a bit with regular yarn to get a feel for the motion and structure of crochet stitches, it's pretty easy!  I came up with my own pattern to create a medium-sized basket, but a search for "plarn" will reveal an abundance of other patterns and ideas.

Making Plarn

1. Gather a stack of plastic bags and a sharp pair of scissors (and a crochet hook if you plan to make a basket like mine).
2. Lay a plastic bag flat and cut off the bottom seam and the handles.
3. Carefully fold the bag in half over and over again until you have a thin tube shape.
4. Cut the bag into slices measuring about an inch wide.
5-8. When you unfold the slices, each one will create a loop shape.  Tie the loops together as seen in the photos below and pull tight.
9. As you create the plarn, wind it into a ball or use a piece of cardboard as a spool.
10. Once you have enough yardage for your desired project, take out your crochet hook and transform your plarn into something new.  Color changes can be achieved by simply tying in a new color at the end of a length of plarn.  

Plarn (Plastic Yarn) Basket Tutorial

Crocheted Plarn Basket

You will need:
• 10-15 plastic plastic bags (I used 10 white plastic grocery bags and 2 dark blue Gap bags)
• Size J crochet hook
• Scissors

The following is a pattern for a medium-sized basket written in standard American crochet terms.  Here's a guide to the abbreviations used: 
ch= chain
sc= single crochet
st(s)= stitch, stitches
*...*= repeat the sequence shown within the asterisks
slst= slip stitch
Note: The bottom rounds are worked continuously, do not join rounds with a slst until instructed to do so when you begin working on the sides.  Use a stitch marker (such as a hairpin or a piece of string) to keep track of your rows.

1. Ch 2; 4 sc in 2nd ch from hook.
2. 2 sc in ea sc around. (8 sts)
3. 2 sc in ea sc around. (16 sts)
4. 2 sc in 1st sc, *1 sc in next sc, 2 sc in next sc* repeat 6 times, 1 sc in last sc. (24 sts)
5. 1 sc in 1st sc, *2 sc in next sc, 1 sc in ea next 2 sc* repeat 6 times, 2 sc in next sc, 1 sc in last sc. (32 sts) 6. 2 sc in 1st sc, *1 sc in ea next 3 sc, 2 sc in next sc* repeat 6 times, 1 sc in ea last 3 sc, join with slst. (40 sts)
7. 2 sc in 1st sc, *1 sc in ea next 4 sc, 2 sc in next sc* repeat 6 times, 1 sc in ea last 3 sc, join with slst. (48 sts)
8. Ch 1, sc in ea sc around, join with slst.
9. Repeat row 8 until your basket reaches the desired height. If you'd like to add a colored rim, simply tie a new color of plarn at the end of the strand and keep working.
10. Tie off and weave in ends.

You will be amazed at how sturdy the finished product is!  In fact, one of my favorite things about the concept of using plastic bags for yarn is that the very characteristic of plastic that makes it so harmful for the environment, its slow decomposition rate, can be used to your advantage for creating durable, useful items such as tote bags, sandals, and rugs.  So grab a handful of plastic bags and let your awesome, earth-loving imagination run wild!

Saturday, August 16, 2014

Crochet Projects for Beginners

Hello there, crafty friends and creative souls!  In an attempt to help spread the art of crochet with young learners, I've been putting together a few very basic crochet projects designed with the absolute beginner in mind.  While my intention is to use these projects at the library to work with local teens on broadening their crafty skills, I also decided to share them with those of you out there in the world who either A) would like to learn and practice crochet, or B) already know how, but enjoy quick and easy project ideas.  

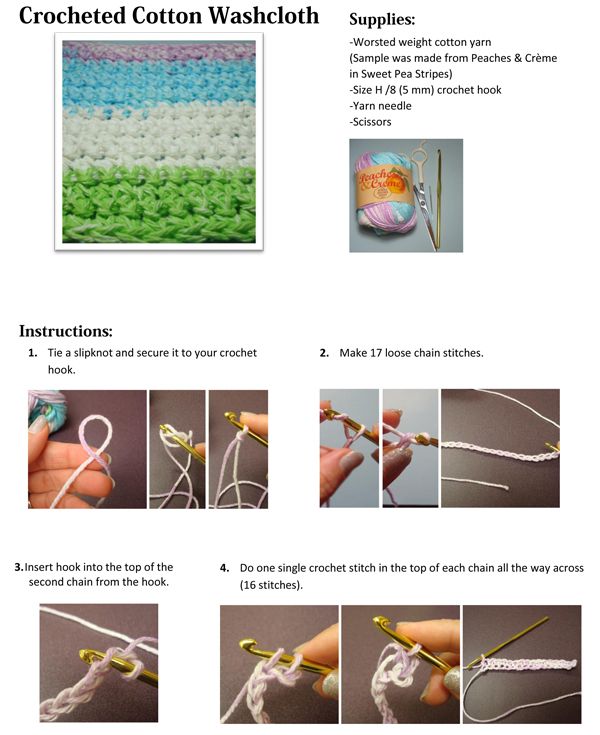
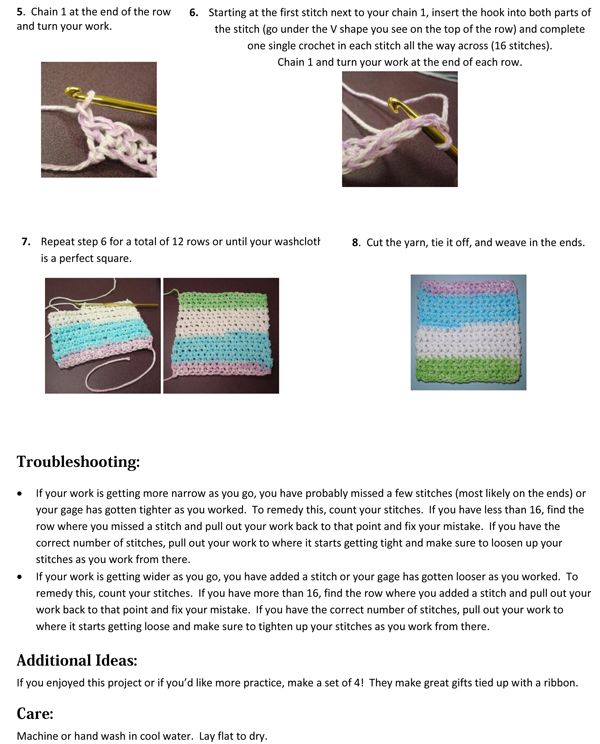
So this is the first and easiest of the two projects, and you can anticipate the other one very soon.  Today, I'm showing you how to make crocheted cotton washcloths (find the printable PDF version here).  I feel the need to emphasize how fast and easy these are to make.  An experienced crocheter can finish one in 15 minutes easily!  They work as washcloths, dish cloths, or even gifts- especially if you make a set of 4 and package them with some nice soap.  Grab your hook and let's get started!


You can finder a larger, printable copy of this tutorial here.  Feel free to share it with any budding crochet artists you might know.  Happy crafting!

Friday, April 18, 2014

DIY Constellation Luminaries

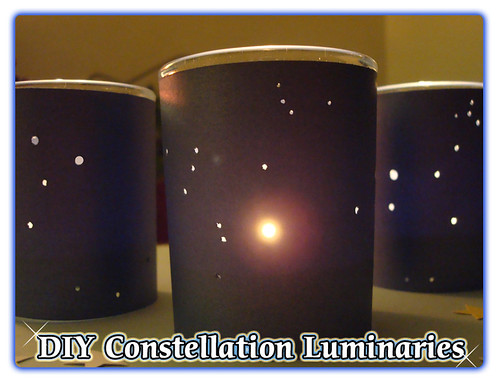
After a frigid and stormy winter here in the Northern Hemisphere, many of us are ready for warm weather and long, sunny days.  To celebrate the coming spring and summer seasons, I dreamed up a tutorial for all my fellow stargazers out there in the world.  So if you're ready for fresh air, fireflies, cold drinks, bare feet, and mild evenings watching the stars sparkling in the sky, I've got a little something to help set the scene.  Keep reading to learn how to make your own constellation luminaries!
DIY Constellation Luminaries
One of the coolest things about this project is that it can be done with any constellation you choose.  For my test run, I created miniature, glowing replicas of the Aquarius, Scorpius, and Pegasus constellations.  You can do an image search on the web to find images of your favorite constellations, or you can use the perfectly-sized templates I've included below.

You will need:
★ Scissors
★ Printed images of constellations sized at 7” x 2.5”
★ Colored paper
★ Pencil
★ Pins
★ Awl or toothpick
★ Tape
★ Glass votive holder
★ Tealight candles

DIY Constellation Luminaries

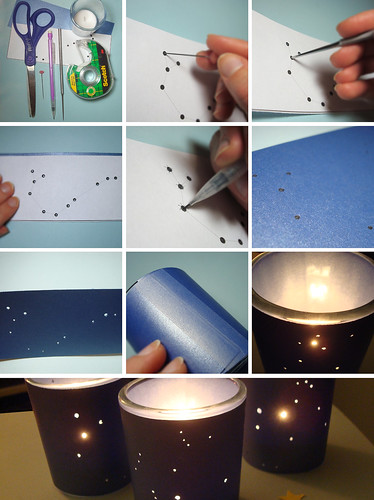
Instructions:
1. Gather supplies and cut paper to measure 7” x 2.5”. 
2. Use a pin to poke holes through the points of the constellation. 
3. Use an awl or toothpick to widen the holes made with the pin. 
4. Lay the constellation image on top of the colored paper. 
5. Use a pencil to fill in the points of the constellation. You may wish to create marks around the holes to keep track and make sure they’re all filled in. 
6. Check the colored paper to make sure all points of the constellation are marked and visible.
7. Repeat steps 2 and 3 on the colored paper to create holes for the light to shine through. 
8. Wrap the colored paper around the votive holder and secure the edges with tape. Trim any excess paper to create a clean edge around the top of the glass. 
9. Light a tealight candle and gently drop it into the luminary. 
10. Repeat this project to create luminaries for all your favorite constellations.

When I was designing this project, I had to do a bit of exploration to find images that were clear and properly sized.  I ended up creating my own templates in Photoshop and decided to share to make it easier for anyone else who might want to join the fun.  Just follow the links below for pre-designed, perfectly sized images to fit your luminaries.  You can either download the photos or send them straight to the printer without downloading (click next to the download button for the print option).  Make sure you set up the print job so that the image fills the whole page to ensure your printout is sized to fit a standard glass votive holder.
Constellation Printables
Click here to download a printable template featuring Pegasus, The Big Dipper, and The Little Dipper.
Constellation Printables
Click here to download a printable template featuring Hercules, Leo the Lion, and Orion.

Monday, February 10, 2014

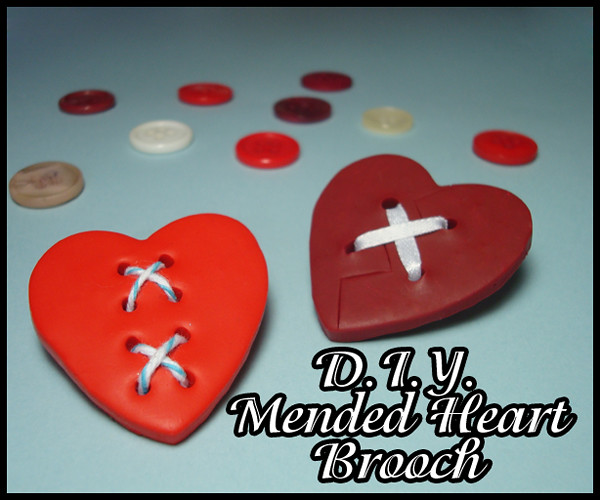
Mended Heart Brooch Tutorial

If you've ever had your heart broken by life's ups and downs, you know how important it is to find ways to heal yourself.  This world is full of tragedy and hope, sadness and sunshine.  Since Valentine's Day is this week and many people find themselves reflecting on the nature of love and relationships, I've noticed this holiday invokes many passions.  Some feel complete rage when faced with the capitalistic rush to buy gifts, while others anticipate a romantic evening spent with a new love or perhaps plot that first move toward someone they have feelings for.  It can go both ways, but like many other issues, I like to keep a sweet little spot for myself somewhere in the middle.  Here's what I mean...

To celebrate Valentine's Day each year, I simply remind myself to be extra thankful for every single arrow I've ever been shot with, romantic or not.  I was struck violently by cupid's arrow when I first became an aunt and have been smitten with this role ever since.  I have "fallen for" new friends, people who have entered my life over the past few years and made it better than it was before.  Rather than completely rejecting this holiday when the concept of love is paraded in my face for a month straight leading up to Valentine's Day, I like to reassert my mission to fall in love with the world around me over and over again.

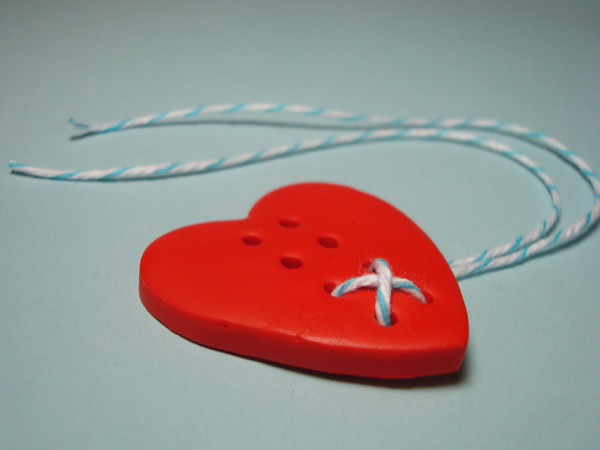
Mended Heart Brooch Tutorial

This project is intended to celebrate those with big hearts, as well as the courage of the human spirit and our ability to patch up our wounds and keep on loving.  So grab these supplies and let's cure it with crafts!

Mended Heart Brooch Tutorial

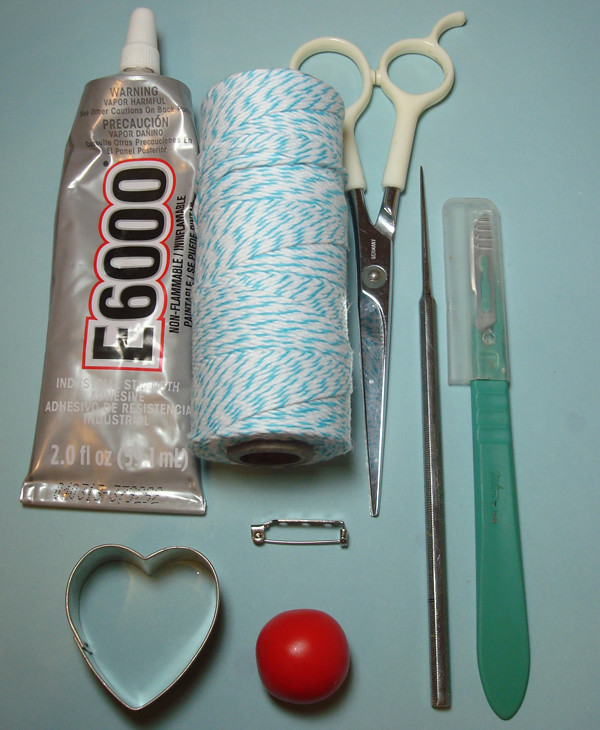
You Will Need:

♥ E6000 glue
♥ Twine, ribbon, or thread
♥ Scissors
♥ A needle, toothpick, or sharp object for piercing clay
♥ A knife or blade (optional, used for adding "broken" heart details)
♥ A pinback
♥ Polymer clay in your choice of brand and color (I used Premo in red)
♥ A miniature heart cookie cutter (can be purchased in the baking section of craft supply stores for under a dollar, or you can sculpt a heart from the clay by hand if you don't want to use a cutter).

Instructions:

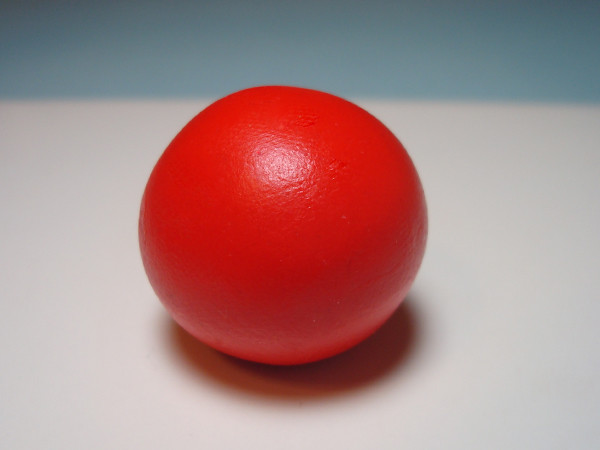
Step 1: Prepare a clean work surface.  I like to use a tile or a sheet of wax paper taped to my craft desk.  Roll a large chunk of clay into a ball (1/4 of the package should be plenty).
Mended Heart Brooch Tutorial

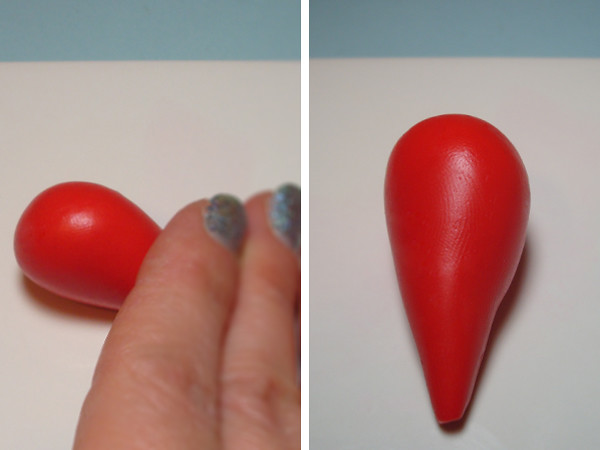
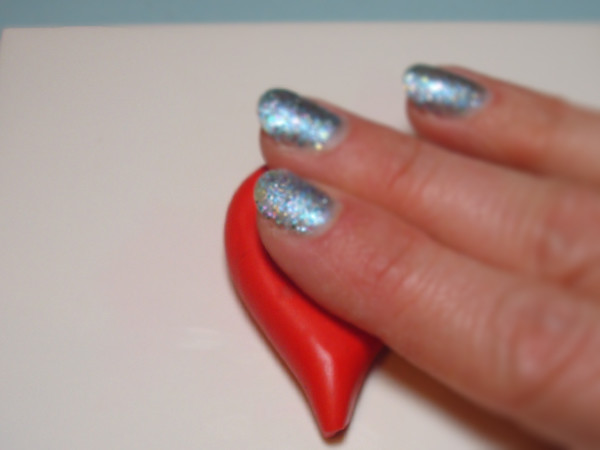
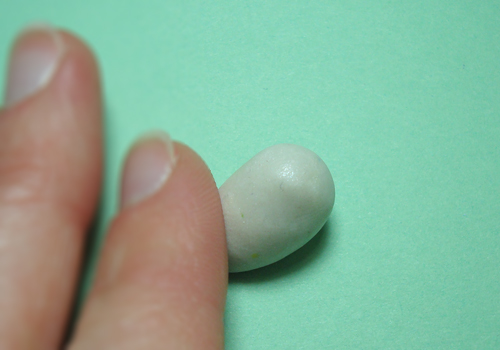
Step 2: Roll the clay on one side with your hand slanted to create a teardrop shape.
Mended Heart Brooch Tutorial

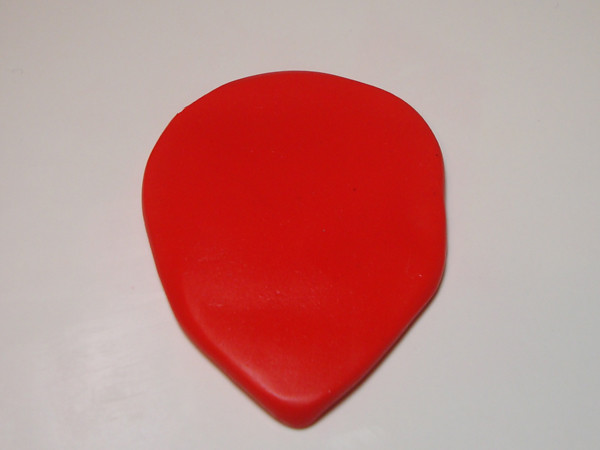
Step 3: Press the teardrop flat with your fingertips.
Mended Heart Brooch Tutorial

Step 4: Continue pressing the clay until the teardrop is flat and spread out enough to accommodate your cookie cutter.  You can use a rolling pin or round object to do this or your fingertips.  If you use your fingers, gently wipe at the surface of the clay when you're finished to remove fingerprints.
Mended Heart Brooch Tutorial

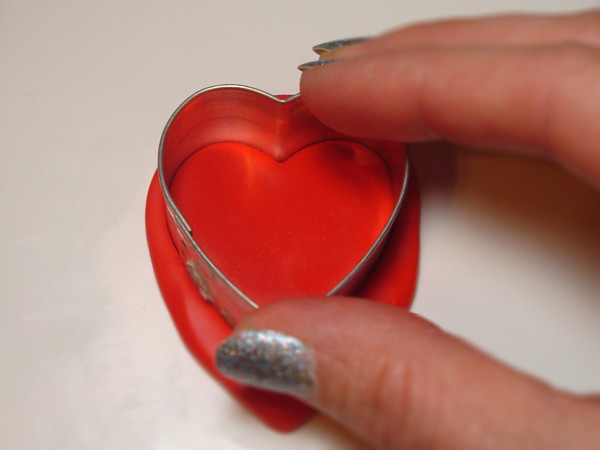
Step 5: Press the cookie cutter onto the clay and cut a heart shape.
Mended Heart Brooch Tutorial

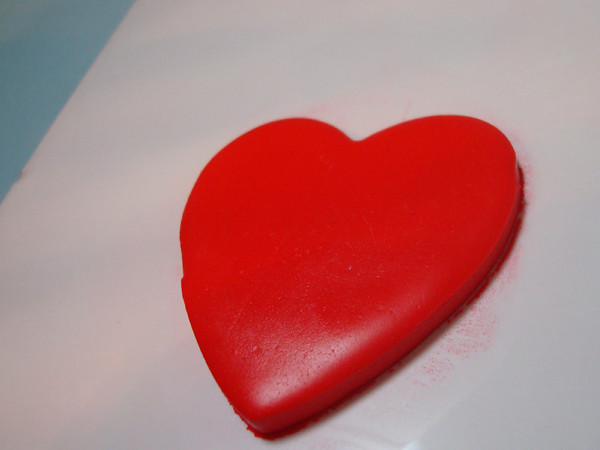
Step 6: Remove the cookie cutter and the excess clay around the edges of the heart.
Mended Heart Brooch Tutorial

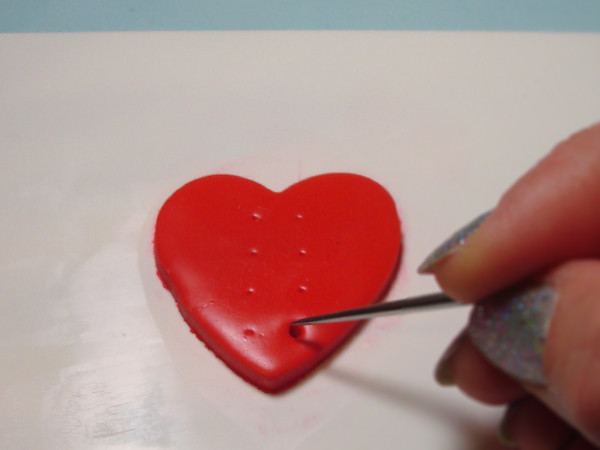
Step 7: Use a pointed tool to plan and penetrate holes in the heart shape.  Make sure the holes are large enough to allow your string to easily pass through.
Mended Heart Brooch Tutorial

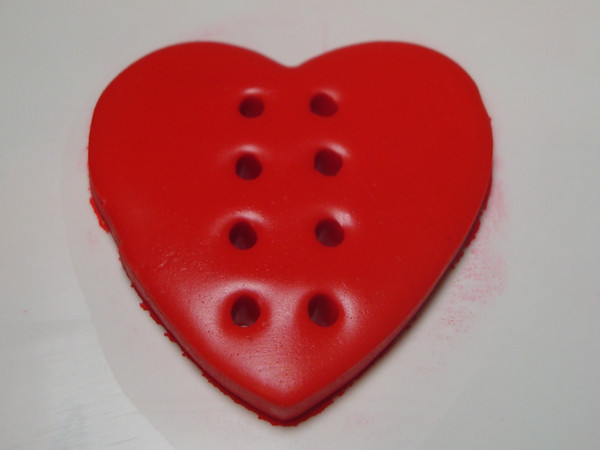
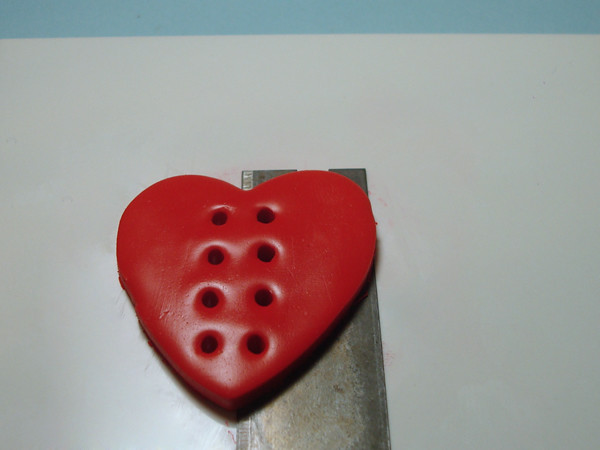
Step 8: Continue until you've made all the punctures you need in your heart.  I made two hearts, and placed 8 holes on one and 4 on the other.  Feel free to get creative with the placement!  Just try to keep in mind that you'll be lacing your string through it later on and try to plan a pattern you like.
Mended Heart Brooch Tutorial

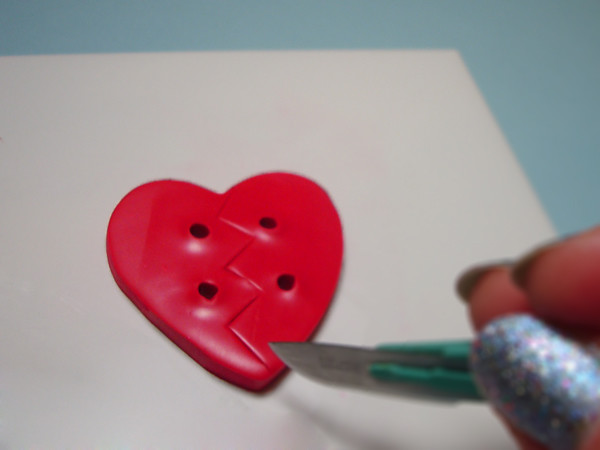
Step 9: If you'd like to create further details, use a knife to leave a "hearbreak" impression in the center of your shape.
Mended Heart Brooch Tutorial

Step 10: Carefully remove the heart from your work surface.  You may wish to use a knife or blade to lift it without distorting the shape.
Mended Heart Brooch Tutorial

Step 11: Bake according to the directions on the package of clay you used.  Allow to cool completely.
Mended Heart Brooch Tutorial

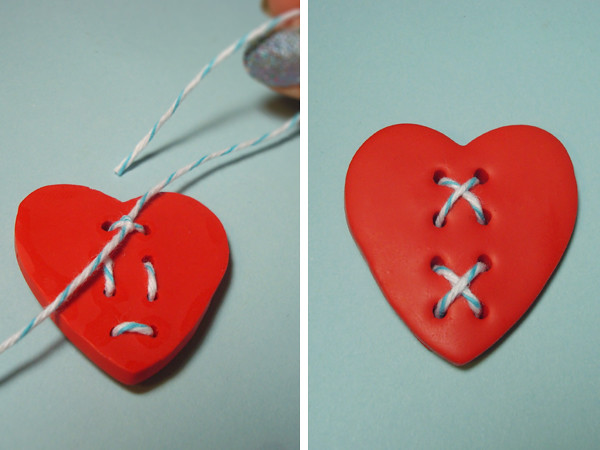
Step 12: Cut a length of string and begin threading it through the spaces on the cured heart.
Mended Heart Brooch Tutorial

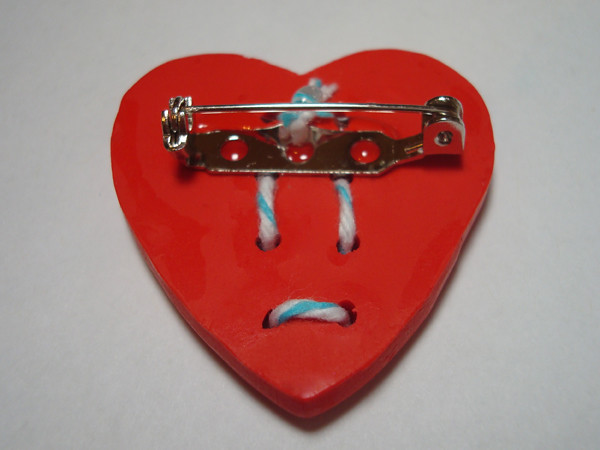
Step 13: Once you've threaded the string to create a pattern you like, tie a double knot on the back of the heart and trim the ends.
Mended Heart Brooch Tutorial

Step 14: Glue the pin to the back of the heart with E6000.  Add a drop of glue to the knot as well to keep it secure.  Allow the glue to dry for 12-24 hours.
Mended Heart Brooch Tutorial

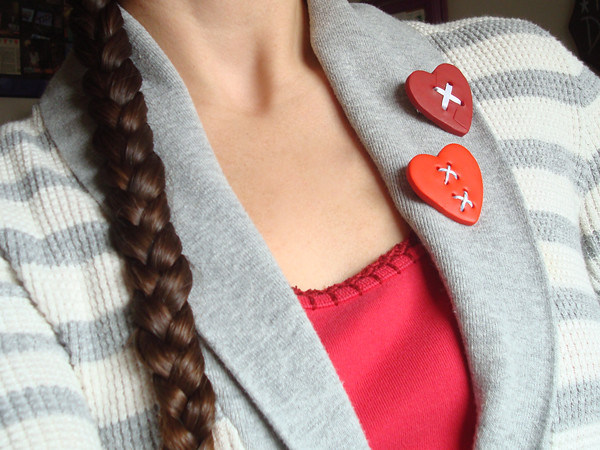
Step 15: Use your new mended heart brooch to adorn your sweater, purse, or backpack.
Mended Heart Brooch Tutorial

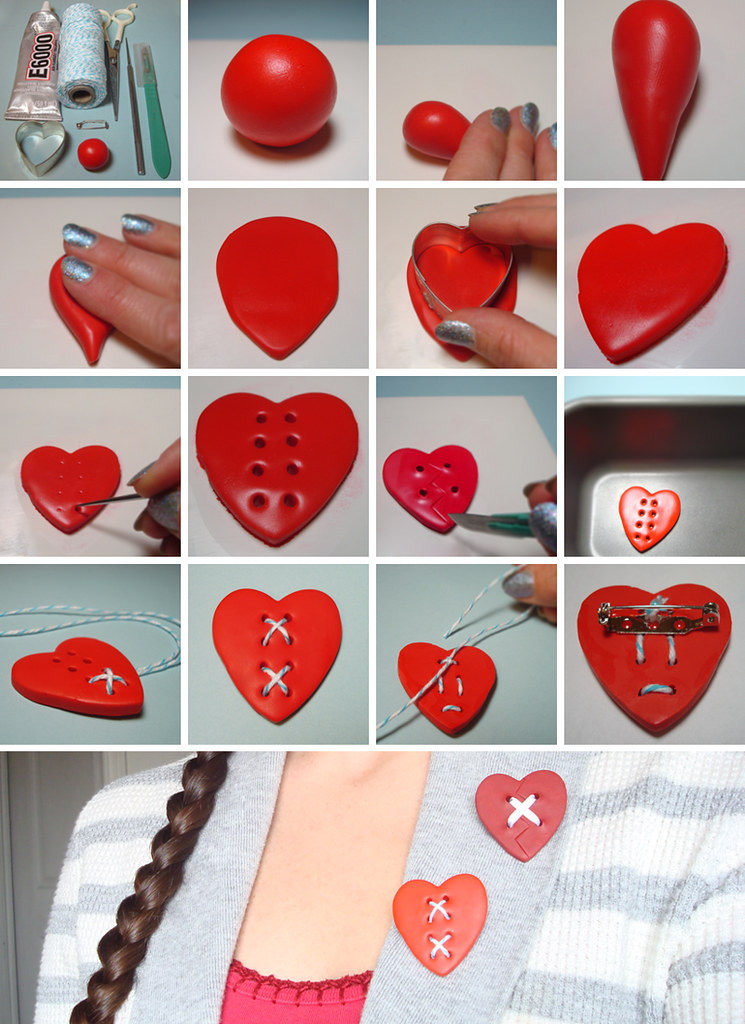
I like to stretch my tutorials out to show detailed photos of each step, but here's a little collage that puts it all together for a start-to-finish view of this project.  Click the photo to zoom.

Mended Heart Tutorial

I hope you have a magical week filled with as much love as your precious heart can possibly hold!

Wednesday, September 25, 2013

The End-of-Summer Outdoor Craft Show Survival Guide

Hello and welcome to the Hollyrocks End-of-Summer Outdoor Craft Show Survival Guide! I'm definitely not trying to sell myself as the reigning queen of craft shows, because goodness knows I'm still learning. But I've gained a bit of experience since I began pursuing a creative side business five years ago, and I always enjoy hearing tips from others as well as sharing my own in case anyone out there might gain something from them.

Untitled

 In a post I wrote for the Make:Tulsa blog, I spouted off my opinions on craft shows in general- topics such as how to choose the right ones, prepare, and display. But exposing yourself and your work to the elements can sometimes be tricky, so after a summer full of fun outdoor events I am here to summarize the things that might make your own experience more pleasant.

 ☀ PITCH A TENT! ☀
Outdoor Craft Show Survival Guide

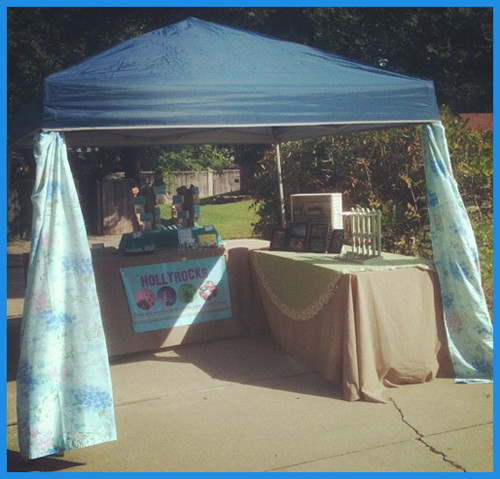
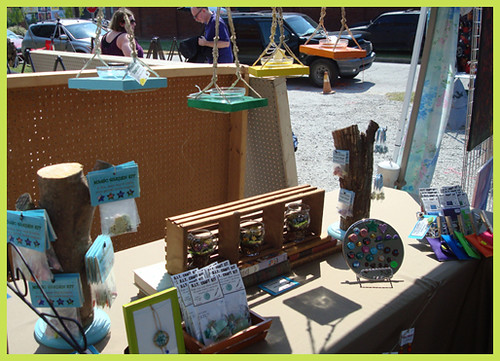
 I cannot overemphasize how important it is to have proper shade when you do an outdoor show. The whole idea is that you will be parked outside for hours on end, but  I've known people to become ill from too much exposure to the sun at outdoor shows.  So for your own comfort and that of your shoppers, supply your booth with adequate shade.

☀ WEIGHTS ARE YOUR FRIEND. ☀
Outdoor Craft Show Survival Guide

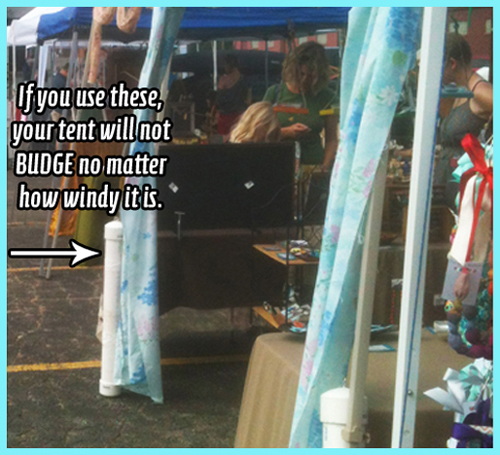
If wind is not a problem in your area the weights won't be such a necessity, but remember I live "where the wind comes sweeping down the plains" and I have seen serious damage done by tents that were not properly weighed down.  My preferred method is a set of PVC pipes filled with cement placed at each corner of my tent.  I zip tie or duct tape them to the feet of my tent and then tie fabric to the corners to decorate my setup and hide the weights.  The fabric is a king-size vintage bed sheet that I bought for $2 at an estate sale and cut into four strips.  It's nothing fancy, but it was easy, inexpensive, and the floral pattern looks lovely in the sunlight.

☀ BRING MORE THAN ENOUGH WATER. ☀
Outdoor Craft Show Survival Guide

The organizers of the show pictured above, The Gypsy Arts Festival, were thoughtful enough to supply all their vendors with cold water throughout the day. However, you can not count on this so it would be wise to bring plenty of water to get you through the show. If coolers are allowed, you might even want to bring an ice chest filled with cold water and snacks to keep you refreshed and hydrated.

☀  USE HEAVY DISPLAYS. ☀
Outdoor Craft Show Survival Guide

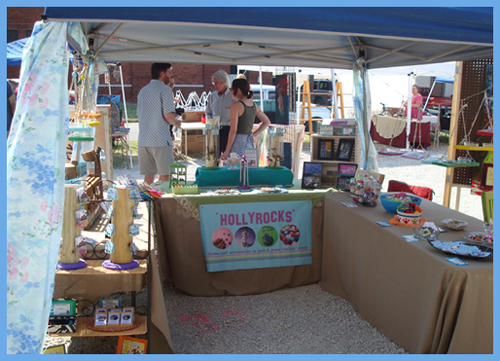
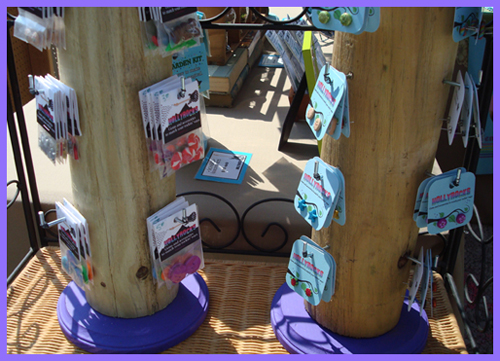
If you've never known the frustration of constantly chasing down windblown products and readjusting your displays, hopefully this tip will spare you the headache.  The fixtures shown above are made of solid wood, and I added tiny rubber bands to the ends of each metal hook to keep the product cards from flying away.  I don't recommend using flimsy displays for any show, indoor or out, but it is especially important to protect your work when you're exposed to the breeze.

☀ PREPARE FOR LOTS OF SUN. ☀
Outdoor Craft Show Survival Guide

Outdoor shows can be so much fun, allowing you the opportunity to hang out in the sunshine, meet new people, and hopefully even get paid for it if you make good sales.  But if you're not adequately prepared to be showered with the sun's powerful rays, your good times can quickly take a downward turn.  Wear a TON of sunscreen and make sure to reapply often.  Dress yourself in clothes that are comfortable and lightweight.  I'm a big fan of cotton (that's right, this guide is so thorough you'll even gain fabric recommendations) and breezy dresses when I do outdoor festivals.

I've had some of my very best shows out in the fresh air and open skies, and I encourage any small business owner to give outdoor craft fairs a try if it's something you're interested in.  Here's a printable checklist I put together if you think it might come in handy.  And if you'd like to come see me at my last outdoor festival of the season, you are guaranteed a GREAT time at the Tulsa Mini Maker Faire this weekend!  There will be all kinds of businesses, inventors, scientists, farmers, designers, and musicians ready to demonstrate and display their creations.  

I'll be set up at the Make:Tulsa booth with a free craft project for you to partake in, so bring your crafty self to this event if you're in the Tulsa area and say hello!
Tuesday, June 4, 2013

DIY Felt Mushroom Toy

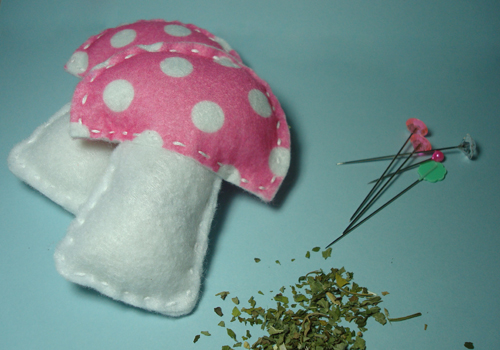
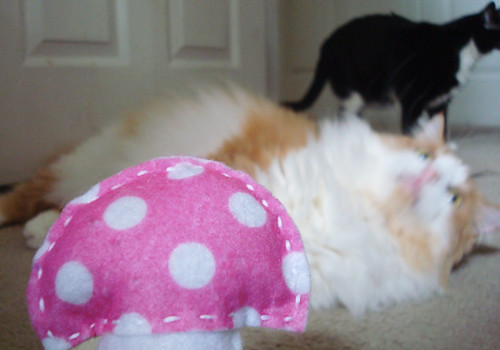
My two kitties love to keep toys around the house.  Every day, when they get bored while I'm asleep or at work, they drag out their toys and string them all over the house.  I'm not really annoyed by it, because I'm thankful to have happy, playful creatures in my care.  They are catnip fiends, so I recently decided to make a few catnip-stuffed mushroom toys for them to cozy up to.  My logic was that they're going to be left all around the house anyway, so I might as well make something cute.  These hand-stitched mushrooms are made from felt stuffed with polyfill and organic catnip.  I couldn't find a good mushroom template in the size and shape I wanted for this project, so I made my own and decided to share. Keep reading for the template, and to see the moment my cats got to claim their new toys.

Felt Mushroom Toy

You will need:
-Felt in 2 colors (bonus points if you can find polka-dotted felt for the mushroom caps)
-Thread or embroidery floss
-Sewing needle
-Quilter's pins
-Scissors
-Polyfill
-Catnip (optional)

I stitched up a set of these so that each cat could have one, then I decided to tempt them with their new treats...

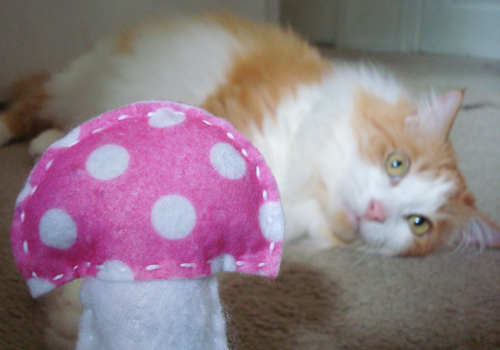
Hello, Caesar.  I have kitty drugs for you.

Felt Mushroom Toy

My other cat, Isis, quickly appears at the mere mention of a good time.  Fiends, I tell you.

Felt Mushroom Toy

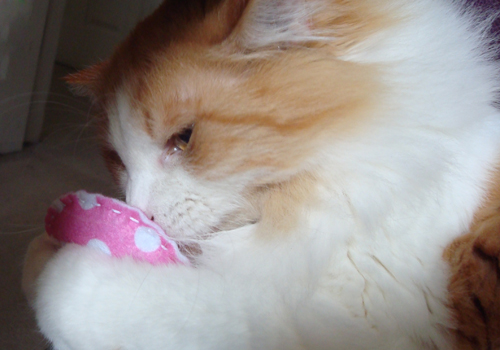
Ooooh this new toy smells niiiiice.  There must be some grade A organic goodness in there.

Felt Mushroom Toy

So they each got their own catnip kitty shroom to cuddle with.  And yes, these little mushrooms have traveled all over my home.  I might find one in the hallway, or one on the couch.  The resident felines approve of their new handmade goodies.  

DIY Felt Mushroom Toy

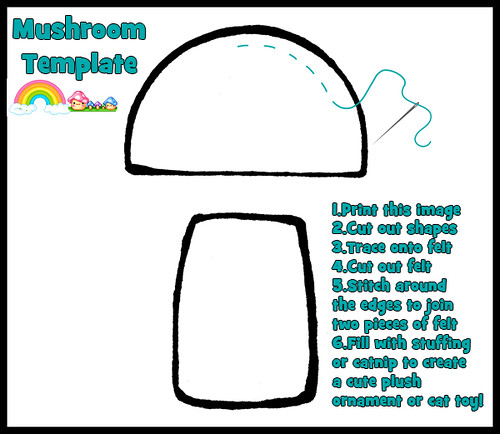
If you'd like to make your own stuffed mushroom toy, I'll supply you with a template that is ready to print and use right here.  Just uncheck the "fit to page" box in the printer settings so that it will print the actual size you need for a small toy.

Felt Mushroom Template

Pictures of adorable children or animals playing with these little mushrooms are strongly encouraged.  Hope you're having a happy summer!

Wednesday, March 27, 2013

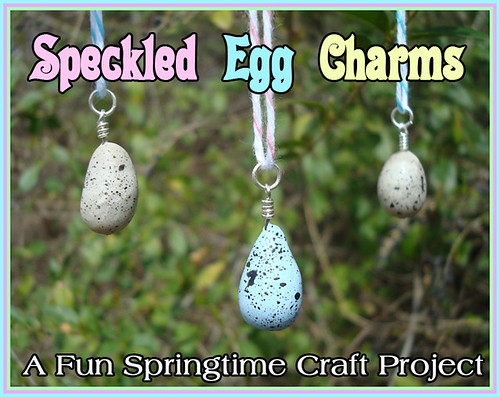
Speckled Eggs Tutorial

Hello and happy spring!  I am fully embracing the lovely weather and all the inspiration that comes fluttering to my craft desk as springtime draws near.  I've even caught myself naming spring as my favorite season, although I'm fully aware that I said the same thing about fall just a few short months ago.  To celebrate this lovely season, I've put together a fun tutorial for anyone who's feeling as crafty and inspired as I have.  This would be a great project for Easter weekend or a sunny afternoon when the birds are chirping outside. 

Spring Egg Tutorial


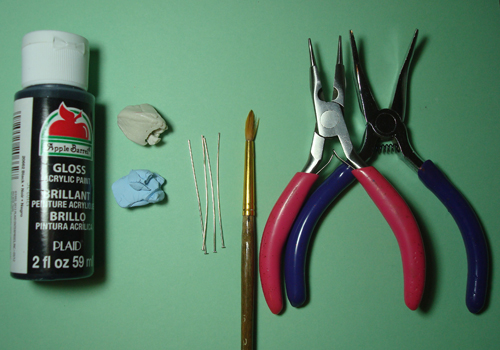
Supplies:
- Black acrylic paint
- Polymer clay in white or light blue
- Headpins
- Paintbrush
- Jewelry pliers

Spring Egg Tutorial

Instructions:
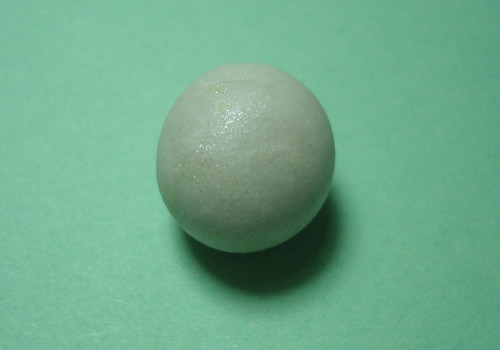
1)  As with any polymer clay project, the first step is to condition the clay by rolling it in your hands, forming a sphere between your palms. 

Spring Egg Tutorial 

2) To create an egg shape, roll the ball of clay on one side only with your hands slanted against a flat surface.

Spring Egg Tutorial 

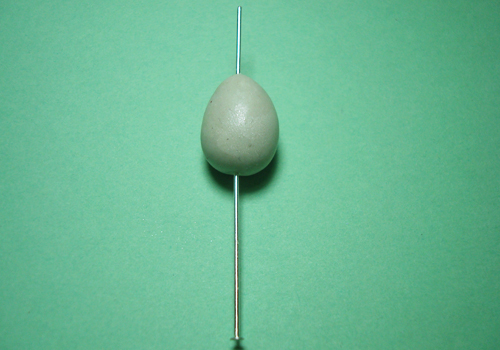
3) Once you've sculpted your clay into a nice egg shape, pierce it vertically with a headpin.  Smooth away any fingerprints by gently running your finger along the surface of the egg.

Spring Egg Tutorial 

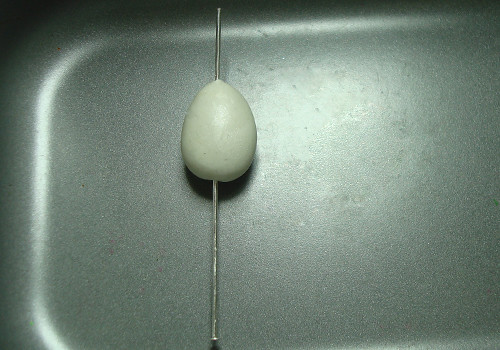
4) Place the clay in an oven-safe pan and bake according to the directions on the package of clay.

Spring Egg Tutorial 

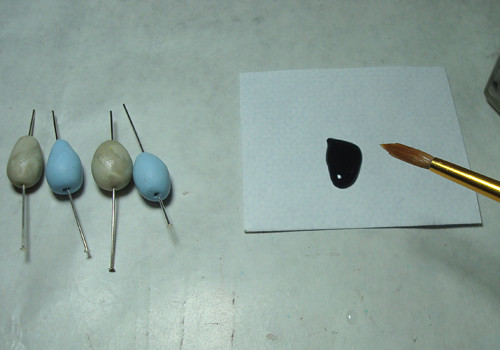
5) Allow the cured eggs to cool completely (about 5-10 minutes after removing them from the oven).  The next part of the project gets pretty messy, so you'll want to cover your work surface with something disposable such as old newspaper.  I used a sheet of parchment paper.  Pour a small puddle of black paint and dip your brush in water.

Spring Egg Tutorial 

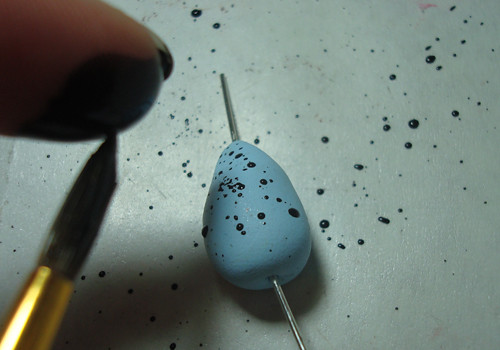
6) Once your brush has been thoroughly soaked with water, dip it in the black paint and begin flicking the paint toward the egg.  Acrylic paint washes off completely with soap and warm water if you wash your hands while it's still wet, so I just used my index finger to flick the paintbrush.

Spring Egg Tutorial

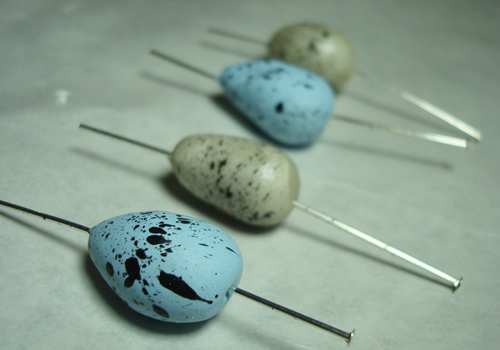
7) Lay the eggs on the disposable paper and allow the paint to dry.

Spring Egg Tutorial 

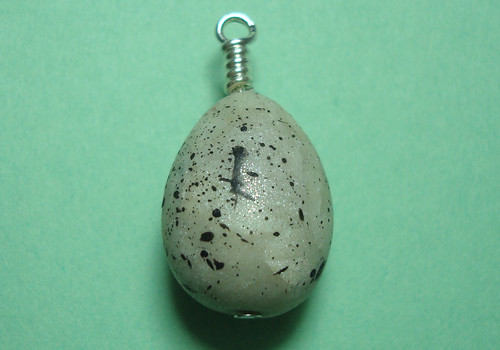
8) Once the paint has dried, it's time to get out your pliers and wire wrap the headpin.  If you need help with this step, you're in luck!  I recently posted a wire-wrapping tutorial on my blog, which you can find here.  If wire-wrapping seems a little intimidating, you can always just bend the top of the headpin to create a loop. 

Spring Egg Tutorial 

9) Continue the last step on any additional egg charms until they've all got a nice loop to dangle from.  You can add a coat of sealer or varnish if you're worried about your paint speckles chipping away. 

Spring Egg Tutorial 

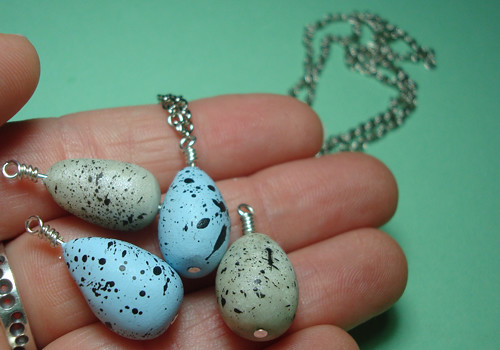
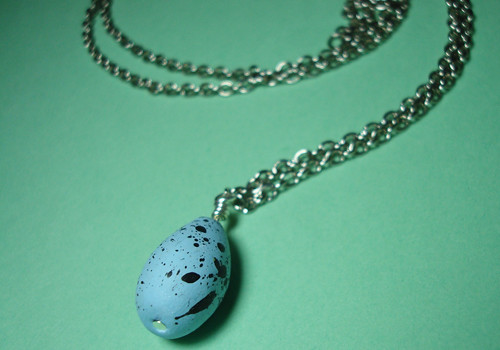
10) You may wish to attach your new charm to a chain to create a lovely nature-inspired necklace.

Spring Egg Tutorial 

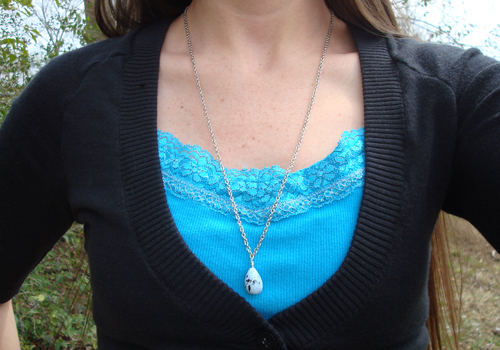
I had so much fun with this project, I decided to wear a colorful outfit to show off my new spring bling.

Spring Egg Tutorial

Additional Ideas:
- Instead of making these into charms, sculpt them without a hole and place them in a little nest or bowl to add a natural touch to your home.  You could create an egg for each family member! 
- These would be a great addition to your child's Easter basket.  Long after the chocolate has been eaten, these keepsakes will still be around to provide springtime memories.
- Thread these charms onto colorful string and use them as ornaments in your trees or plants.
- If you are doing this project with children, use it as a learning opportunity!  See if your local library has any nonfiction books about eggs.  A few suggestions are Guess What Is Growing Inside This Egg by Mia Posada and Eggs by Marilyn Singer.
- Go on a nature walk and see if you can spot any bird's nests.

I hope your spring is full of warm days, long walks, and all the beauty nature has to offer!