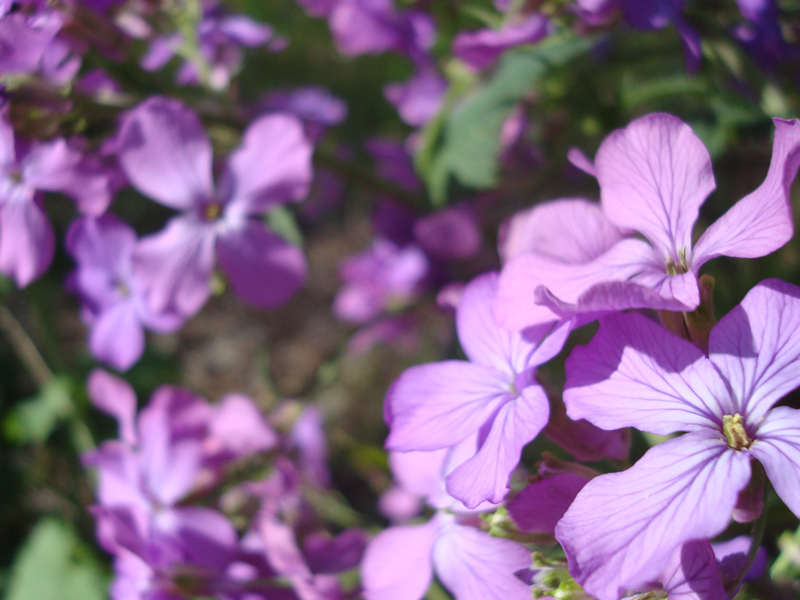
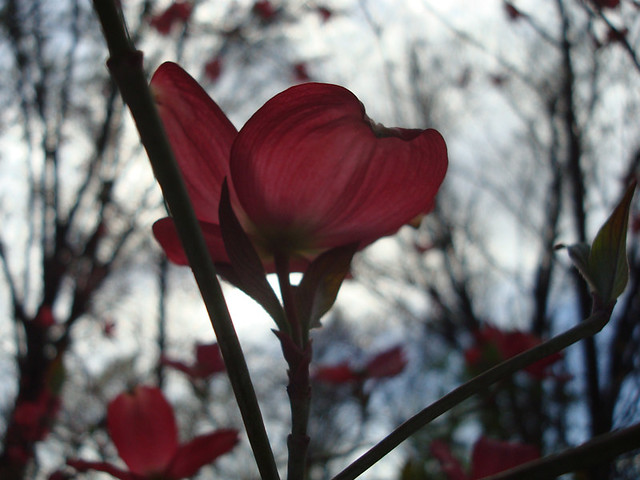
Showing posts with label seasons. Show all posts

Sunday, April 20, 2014

A Friendly Hello

I'm just dropping by to show off the sweet amigurumi bunnies I made for my niece and nephews and wish everyone a happy Easter!

Easter Amigurumi

In fact, I hope the entire spring season is treating you well!  May we all be surrounded by beauty and blessed with the ability to appreciate it.

Spring 2014

Spring 2014

Friday, April 18, 2014

DIY Constellation Luminaries

After a frigid and stormy winter here in the Northern Hemisphere, many of us are ready for warm weather and long, sunny days.  To celebrate the coming spring and summer seasons, I dreamed up a tutorial for all my fellow stargazers out there in the world.  So if you're ready for fresh air, fireflies, cold drinks, bare feet, and mild evenings watching the stars sparkling in the sky, I've got a little something to help set the scene.  Keep reading to learn how to make your own constellation luminaries!
DIY Constellation Luminaries
One of the coolest things about this project is that it can be done with any constellation you choose.  For my test run, I created miniature, glowing replicas of the Aquarius, Scorpius, and Pegasus constellations.  You can do an image search on the web to find images of your favorite constellations, or you can use the perfectly-sized templates I've included below.

You will need:
Scissors
Printed images of constellations sized at 7” x 2.5”
Colored paper
Pencil
Pins
Awl or toothpick
Tape
Glass votive holder
Tealight candles

DIY Constellation Luminaries

Instructions:
1. Gather supplies and cut paper to measure 7” x 2.5”. 
2. Use a pin to poke holes through the points of the constellation. 
3. Use an awl or toothpick to widen the holes made with the pin. 
4. Lay the constellation image on top of the colored paper. 
5. Use a pencil to fill in the points of the constellation. You may wish to create marks around the holes to keep track and make sure they’re all filled in. 
6. Check the colored paper to make sure all points of the constellation are marked and visible.
7. Repeat steps 2 and 3 on the colored paper to create holes for the light to shine through. 
8. Wrap the colored paper around the votive holder and secure the edges with tape. Trim any excess paper to create a clean edge around the top of the glass. 
9. Light a tealight candle and gently drop it into the luminary. 
10. Repeat this project to create luminaries for all your favorite constellations.

When I was designing this project, I had to do a bit of exploration to find images that were clear and properly sized.  I ended up creating my own templates in Photoshop and decided to share to make it easier for anyone else who might want to join the fun.  Just follow the links below for pre-designed, perfectly sized images to fit your luminaries.  You can either download the photos or send them straight to the printer without downloading (click next to the download button for the print option).  Make sure you set up the print job so that the image fills the whole page to ensure your printout is sized to fit a standard glass votive holder.
Constellation Printables
Click here to download a printable template featuring Pegasus, The Big Dipper, and The Little Dipper.
Constellation Printables
Click here to download a printable template featuring Hercules, Leo the Lion, and Orion.

Friday, November 22, 2013

Fitness Friday #15- The Most Satisfying Vegetarian Chili I've Ever Had

As cold weather approaches, I typically begin searching for warm, satisfying dishes to cozy up with on a winter evening.  One of the more obvious choices is chili, but I've had a difficult time finding a vegetable chili as filling or flavorful as I'd like.  I finally found the perfect mixture of veggies and texture with this delicious recipe I put together, which was heavily modified from the home-style chili found in Betty Crocker's Easy Everyday Vegetarian (my favorite cookbook).  The addition of the tofu crumbles gives the illusion of meat, and the combination of finely chopped vegetables and a blend of warm seasonings make this chili the best I've tasted since I went meat-free a few years ago.  Additionally, it's easy to make, inexpensive, and yields enough to feed a group.  

The Most Satisfying Vegetarian Chili I've Ever Had

The Most Satisfying Vegetarian Chili I've Ever Had
Serves 8

                1 package (12 oz) tofu crumbles
                2 tablespoons vegetable oil
                1 yellow onion, minced
                1 green bell pepper, chopped
                1 clove garlic, minced
                2 carrots, chopped
                1 can (4.5 oz) chopped green chilies
                1 teaspoon ground cumin
                1 tablespoon chili powder
                1/8 teaspoon ground clove
                1 tiny sprinkle of nutmeg
                3/4 teaspoon salt
                2 cans kidney beans, drained and rinsed
                2 cans fire roasted diced tomatoes, undrained
                1 1/2 cup water

The Most Satisfying Vegetarian Chili I've Ever Had

1. Wash and prepare your vegetables.  Chop them into very small pieces to ensure the vegetables will cook quickly and the flavors will blend well.  Measure your spices into a small bowl and mix until combined.  Feel free to alter the seasonings as you like, but I do recommend using the exact amount of ground clove.  More would be too much, but less would deprive this recipe of the delicious, warm flavor it adds.
2. In a large pot, heat oil and add onion, bell pepper, carrots, garlic, and green chilies.  Cook 7-10 minutes, stirring occasionally.
3. Stir in remaining ingredients and bring to a boil.  Reduce heat and simmer uncovered 20 minutes or until vegetables have reached the desired tenderness.
4. Serve with bread, rice, crackers, tortilla chips, shredded cheese, or all by itself considering this chili is delicious and filling on its own.  Light a candle, have a cup of hot tea for dessert, and enjoy a cozy evening.

If you've been looking for that perfect chili recipe, I hope you'll give this healthy choice a try!  Even if you're not usually a fan of tofu, the crumbles soak up the seasonings and the vegetable flavors to create a very hearty bowl of chili to keep you warm on blustery, winter nights.  So grab your cutting board, chop up some fresh veggies, and enjoy the savory scent of this meal simmering on your stovetop.  

Wednesday, July 3, 2013

Bathing Blue Jay

Every summer, I make a special effort to keep plenty of fresh water in my yard for the local wildlife.  I do have a bird bath which is frequently used, but I also keep a few small dishes with fresh water for any little creatures who might be thirsty.  I recently filled the dishes on my deck with water and seed, a songbird mixture containing sunflower seeds and peanuts (which blue jays find irresistible) .  As I was watching a blue jay feast on the peanuts, the water must have been so appealing that he decided to jump right in for a bath.  Luckily, I had my camera nearby so I was able to capture some photos of this little cutie cooling off on a warm summer day.

Here he is with a belly full of peanuts, cocking his head to the side as if he was pondering the pool of water next to his lunch.

Bathing Blue Jay (1)

I thought he was going to take a drink, but instead he hopped right in.

Bathing Blue Jay (2)

Bathing Blue Jay (3)

Splash!

Bathing Blue Jay (4)

And here he is, all fluffed up and squeaky clean! Pretty handsome little guy, isn't he?

Bathing Blue Jay (5)

Birds aren't the only creatures who take advantage of the water I provide on hot days.  For the Wildlife Feeding Stations I featured in my last post, I made sure to design them so that generous humans could offer food AND water to the critters in their region.  A little squirrel has started visiting the one I kept for my own yard, and he made sure to gulp up plenty of water after he filled up on sunflower seeds.  Here he is, sipping away!

Sipping Squirrel

If you're interested in attracting little animals to your home, here's a link to a post I wrote a few years ago with tips on how to turn your space into a woodland wonderland.  And even if feeding the animals is not a responsibility you'd like to take on, I'm sure a little bowl of fresh water on a hot day would be much appreciated by your local wildlife.  

For all of my readers who are in the midst of summer right now, I'm wishing you lots of sunny days, ripe watermelon chilled in the fridge (my favorite summertime treat), and maybe a snowcone or two before the season is over!

Thursday, April 25, 2013

How Does Your (Urban) Garden Grow?

Want some guidance for your garden this year? Come out to the Schusterman-Benson Library for an awesome class led by a gardening expert (and a wonderful lady I'm lucky to know), Jenny from Ellaberry Gardens. This woman KNOWS gardens, and she'll be sharing some tips on growing your own food and even conducting a Q&A session. We'll also have a selection of garden-themed library books available to check out. This free class is open to the public so grab your straw hat and knee pads because after this class, you'll want to spend some serious time in the dirt!

Urban Gardening Class

I'll give you a little sneak preview of what to expect at this fun springtime event. These are some of the books we'll have available for checkout, plus many more.

Urban Gardening Class

Additionally, one person who attends will win a gardening gift basket containing 3 books, gloves, tools, and cilantro seed bombs!

Urban Gardening Class

Having taken one of Jenny's classes before, I'm very excited about this and I think it will be just the motivation I need to move beyond my current setup of potted flowers and herbs. Even though I haven't planted any vegetables yet, I've been enthusiastically observing the signs of the season.

Springtime in my Backyard

Springtime in my Backyard

Springtime in my Backyard

Springtime in my Backyard

Springtime in my Backyard

Springtime in my Backyard

Springtime in my Backyard

Springtime in my Backyard

Springtime in my Backyard

This is all I really have to show when it comes to gardening at the moment, but hopefully that will change soon...  Happy Spring!

Wednesday, March 27, 2013

Speckled Eggs Tutorial

Hello and happy spring!  I am fully embracing the lovely weather and all the inspiration that comes fluttering to my craft desk as springtime draws near.  I've even caught myself naming spring as my favorite season, although I'm fully aware that I said the same thing about fall just a few short months ago.  To celebrate this lovely season, I've put together a fun tutorial for anyone who's feeling as crafty and inspired as I have.  This would be a great project for Easter weekend or a sunny afternoon when the birds are chirping outside. 

Spring Egg Tutorial


Supplies:
- Black acrylic paint
- Polymer clay in white or light blue
- Headpins
- Paintbrush
- Jewelry pliers

Spring Egg Tutorial

Instructions:
1)  As with any polymer clay project, the first step is to condition the clay by rolling it in your hands, forming a sphere between your palms. 

Spring Egg Tutorial 

2) To create an egg shape, roll the ball of clay on one side only with your hands slanted against a flat surface.

Spring Egg Tutorial 

3) Once you've sculpted your clay into a nice egg shape, pierce it vertically with a headpin.  Smooth away any fingerprints by gently running your finger along the surface of the egg.

Spring Egg Tutorial 

4) Place the clay in an oven-safe pan and bake according to the directions on the package of clay.

Spring Egg Tutorial 

5) Allow the cured eggs to cool completely (about 5-10 minutes after removing them from the oven).  The next part of the project gets pretty messy, so you'll want to cover your work surface with something disposable such as old newspaper.  I used a sheet of parchment paper.  Pour a small puddle of black paint and dip your brush in water.

Spring Egg Tutorial 

6) Once your brush has been thoroughly soaked with water, dip it in the black paint and begin flicking the paint toward the egg.  Acrylic paint washes off completely with soap and warm water if you wash your hands while it's still wet, so I just used my index finger to flick the paintbrush.

Spring Egg Tutorial

7) Lay the eggs on the disposable paper and allow the paint to dry.

Spring Egg Tutorial 

8) Once the paint has dried, it's time to get out your pliers and wire wrap the headpin.  If you need help with this step, you're in luck!  I recently posted a wire-wrapping tutorial on my blog, which you can find here.  If wire-wrapping seems a little intimidating, you can always just bend the top of the headpin to create a loop. 

Spring Egg Tutorial 

9) Continue the last step on any additional egg charms until they've all got a nice loop to dangle from.  You can add a coat of sealer or varnish if you're worried about your paint speckles chipping away. 

Spring Egg Tutorial 

10) You may wish to attach your new charm to a chain to create a lovely nature-inspired necklace.

Spring Egg Tutorial 

I had so much fun with this project, I decided to wear a colorful outfit to show off my new spring bling.

Spring Egg Tutorial

Additional Ideas:
- Instead of making these into charms, sculpt them without a hole and place them in a little nest or bowl to add a natural touch to your home.  You could create an egg for each family member! 
- These would be a great addition to your child's Easter basket.  Long after the chocolate has been eaten, these keepsakes will still be around to provide springtime memories.
- Thread these charms onto colorful string and use them as ornaments in your trees or plants.
- If you are doing this project with children, use it as a learning opportunity!  See if your local library has any nonfiction books about eggs.  A few suggestions are Guess What Is Growing Inside This Egg by Mia Posada and Eggs by Marilyn Singer.
- Go on a nature walk and see if you can spot any bird's nests.

I hope your spring is full of warm days, long walks, and all the beauty nature has to offer!

Monday, December 24, 2012

Have a Crafty Christmas

Hello and happy holidays, my friends! I just wanted to drop by and send you all some warm wishes on Christmas Eve. I'm hanging out at home, enjoying some downtime during this season of festivities. Wintertime is always a favorite of mine when it comes to making things. All the gift-giving and decorating make a perfect excuse to dive deep into your crafty side. I'm here not only to wish you the happiest of holidays, but also a season of unbridled creativity and heaps of inspiration. Here are a some of the crafty things I've been up to!

I did a live segment this morning on Great Day Green Country where I demonstrated how to decorate stockings for your pets. These are very kid-friendly because you just use tacky glue with printed cardstock and felt cutouts. The little garlands are made of usable treats for your pet (Milkbones for dogs and catnip toys for cats) which can be removed as you count down the days until Christmas.

Have a Crafty Christmas

Last week, I was featured on Good Day Tulsa with a fun tutorial on how to make your own gift bags and from recycled paper.

Have a Crafty Christmas

If you're like me and you've still got some wrapping to do today, maybe this video will come in handy. You might even have a giggle when the host points out my impressive scissor collection.


When I think about what kind of crafty things I'd like to attempt in the coming year, I feel the urge to dedicate more time crocheting. I'm getting awfully excited about my new-found ability to create functional, wearable items like this purple and black beanie I made from a soft cotton yarn. I was also able to take care of a few people on my list with handmade scarves and hats for winter.

Crochet Beanie

What kind of creative endeavors do you think the next year will hold for you? Whatever they may be, I wish you the best. ♥

Tuesday, November 6, 2012

Fall is My Happy Place

Every single year, I eagerly observe the trees waiting for it to visit.  I walk through the grocery store with a grin on my face as soon as the pumpkins arrive. I plot which scary movies I'll watch on Halloween, and I get all giddy with anticipation when I fill a massive bowl with candy and flip on the porch light.  I brew extra coffee on chilly mornings.  I light cinnamon candles. I utilize both the heater and the air conditioner within a 12 hour span because the warm sunshine gives way to cool nights.  And, of course, I keep my camera close by so I can document the beauty of my favorite season (but don't get too sure of yourself, autumn, I'm known to say that about spring as well).

Fall

Fall

Fall

Fall

Fall

Fall

Fall

Gypsy in the Leaves

Apparently I also take fall portraits of my dog because she's super cute lounging in the leaves and I can't help it. What's your favorite season?