

This project is great for children (with some assistance) and adults alike, and it may come in handy the next time you need to put together a costume on short notice. You probably even have most of the supplies already, making this a very inexpensive (we're talking less than $5) activity for you and your faerie friends. Let's get started!
Supplies:
-2 colors of polymer clay
-Glitter (optional)
-Yarn or string in a color that matches your hair
-A knife
-A toothpick or other sharp pointy object (I used a dental tool that I keep for crafting purposes)
STEP 1: Prepare a clean work surface to keep the clay from getting dirty. If you have wax paper, tear off a sheet and tape it to your surface.
STEP 2: Take a piece off your block of clay and warm it in your hands. Roll it into a ball measuring about 1 inch in diameter (or larger if you want larger horns). Do this with each color.

STEP 3: Squish the two colors together and mash them up randomly. Mix them up to create a swirled effect.
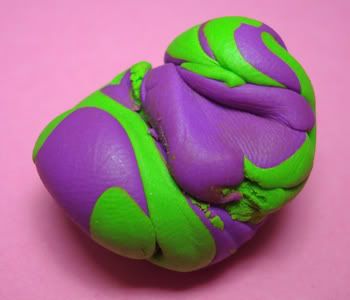
STEP 4: Once you are satisfied with the amount of swirling you've created, form a new, larger ball.
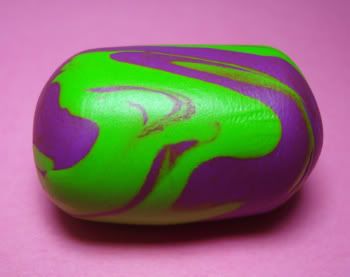
STEP 5: Roll the ball gently to form a short, chubby snake.
STEP 6: Use a knife to cut the tube shape in half.

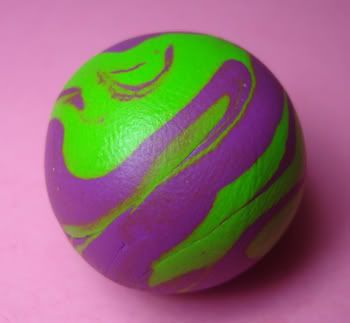
STEP 7: Roll the two pieces into balls. If you want, you can squish the colors around even more at this point to make sure you've got a nice swirled pattern.

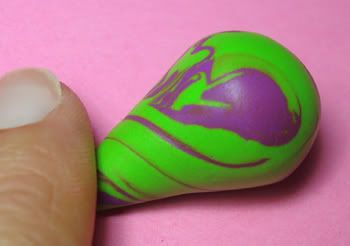
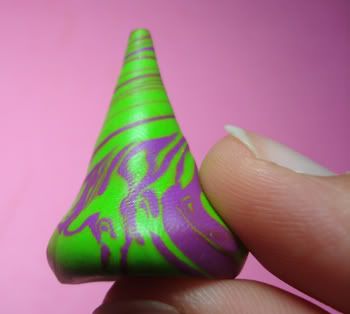
STEP 8: On the first ball, roll just one side to create a teardrop shape. Here's a tip to create a tight spiral pattern at the end- only roll in one direction. For example, don't roll back and forth. Just roll up, and you will notice that the colors will swirl together nicely around the tip of your teardrop shape.
STEP 9: Use your thumb and your index finger to squish the edges of the teardrop shape. The goal here is to flatten the bottom of the shape to create a cone that will sit flat on top of your head.
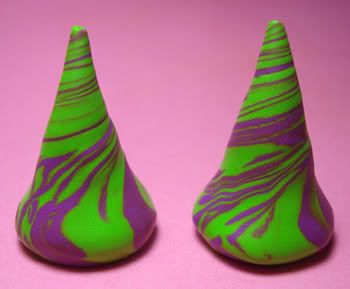
STEP 10: Repeat steps 8 and 9 with the other ball of swirled clay so that you have two horn shapes. You also may wish to start preheating your oven right about now if you'd like for it to be ready as soon as you're done with your horns.
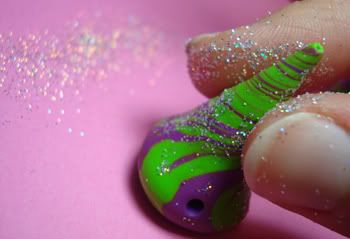
STEP 11: Using a toothpick or other sharp pointy tool, poke a hole all the way through the base of each horn. The hole should be large enough to accommodate the string you'll be using.

STEP 12: OPTIONAL- If you'd like glitter on your horns, sprinkle a small amount on your work surface. Use your fingertips to lightly press the glitter into the clay. Don't use too much, or your beautiful swirls will be hidden.
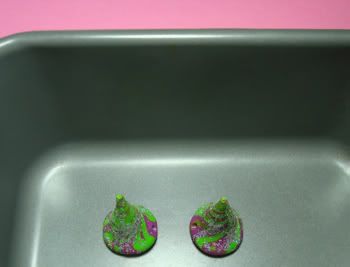
STEP 13: Place your horns in a baking dish. If your oven is done preheating, you may go ahead and start baking them. Check your package of clay for precise baking instructions (it varies depending on what brand you use).
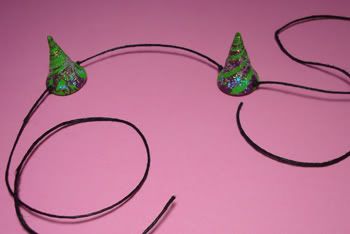
STEP 14: When your horns are done baking, allow them to cool for at least 10 minutes before proceeding. Cut a piece of string so that it is long enough to go all the way around your head like a headband and tie in back. Tie a knot at the spot you'd like the first horn to be placed on your head. Make sure your knot is large enough that it won't slip through the hole you made in the horn. Thread the horn up against the knot and tie another knot on the opposite side.

STEP 15: Repeat this process with the second horn. You will need to leave a few inches of string in between the horns so they will sit apart from each other on your head.
You're done! Now comes the best part- try them on! Just place the horns where you'd like them to sit and tie the ends together at the back of your head. I recommend wearing them as you play in the grass on a hot summer day. They will make any backyard adventure a little more magical.

Enjoy!
23 comments:
Those are cute!
Those are so cute! I*m digging the tie dye pants your wearing!
Green and purple! so eviil! LOL,
omg! That is so psychedelic ! cute!
Too cute!! I don't know though if I would want everyone to see my "horns". It's better if they think I'm sweet LOL
Very cute :) I wear little devil horns like this every year for Halloween at my kids' school!
You are pretty cute.
Holly, those are so cute! I LOVE, LOVE your outfit! The skirt is to die for.
I wanted to thank you for the beautiful comment you left on my blog. You're sweet! ~(; It made me feel a little better about turing 16.
Hope all is well!
-Raven :)
I can't tell which is cuter...you or those tiny horns!
So cute and totally fun! I love it!
super cute idea! :)
thanks for the sweet comment on my blog! this tutorial looks so easy and fun!
you are so creative :)
You're so creative to make those cute horns!
Those are so cool!!! I wonder if you could make some cute hello kitty ears with that clay...hint hint!!
All your projects and crafts are awesome! Thanks for sharing your secrets on this one:) ~ Margie
Great job lady. My creativity is no match for yours!
cute idea!! love your blog name!! XXX
Is this inspired by Shrek? It looks so cute (on you)!! Maybe I should make huge red ones for halloween this year! Or just a single white horn like a unicorn? Heh. Thanks for all the fun!
Oh my gosh Holly, you seriously DO Rock Sister! I am so making some of these!!
Thank you for this! :) Would make an idea gift for a friend!
Wow, these are awesome and cute! Thank you for posting this, as a person who likes Homestuck and also cosplaying, I find this idea amazing to do, so you don't have that much work with screwing the horns on a headband, and it looks much more natural! I'm trying to do this now, thanks a lot!
I used this idea to make a unicorn horn and its awesome! Thanks for the help!
Post a Comment